Use External 3D Models
There is a possibility to import 3D models made in professional 3D software like Blender, AutoCAD, and SketchUp. Room Arranger uses X3D standard for 3D scenes and the 3D viewers support also other file formats for 3D models inside.
Formats supported (Room Arranger 11 and above):
- .wrl (VRML) - supported in Room Arranger version 10 and below
- .glb - recommended for modern 3D models (glTF binary)
- .gltf, .obj, .ply, .stl, .x3d, .x3dv, .x3dz
1. Find the Model
In our example, we will import a flower, Orchid from poly.pizza. You can find it here: orchid.glb.
2. Use the Model
The model needs some 2D representation. It can be any object, including Group or Polygon.
A. Drag and Drop the file to the project
The easiest way is to drag and drop the GLB file to the project, or use menu Project - Open. Room Arranger will show the dialog to set the correct dimensions and the 2D representation of the model.
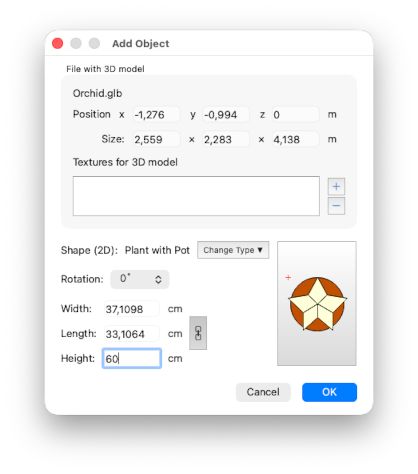
Room Arranger will detect the dimensions of the model and will set the size of the object accordingly.
In our Orchid example, the detected dimensions are in metres, which is unrealistic, so we need to adjust the height to 60 cm, preserving the aspect ratio for width and length.
You should also select the 2D shape of the model. In our example, we will use the Plant with Pot object from the Garden library. You can change it later in the Object properties.
The rotation is used for cases when the model needs to be rotated to match the orientation of the 2D representation.
Additional texture files
In case the 3D model comes with additional texture files, please add them to Textures for 3D model section. All files will be copied into the project structure and the original files are no longer needed.
However this may still present some issues, so we recommend to pack the model with textures into GLB format, which is a single file.
B. Define the Model for the existing object
Alternatively, when you already have some object in your Room Arranger project, for example Plant object from the library, go to its properties and click More (3D)... button. Navigate to Shape section and click on ... button next to File with 3D model. Select the downloaded GLB file.
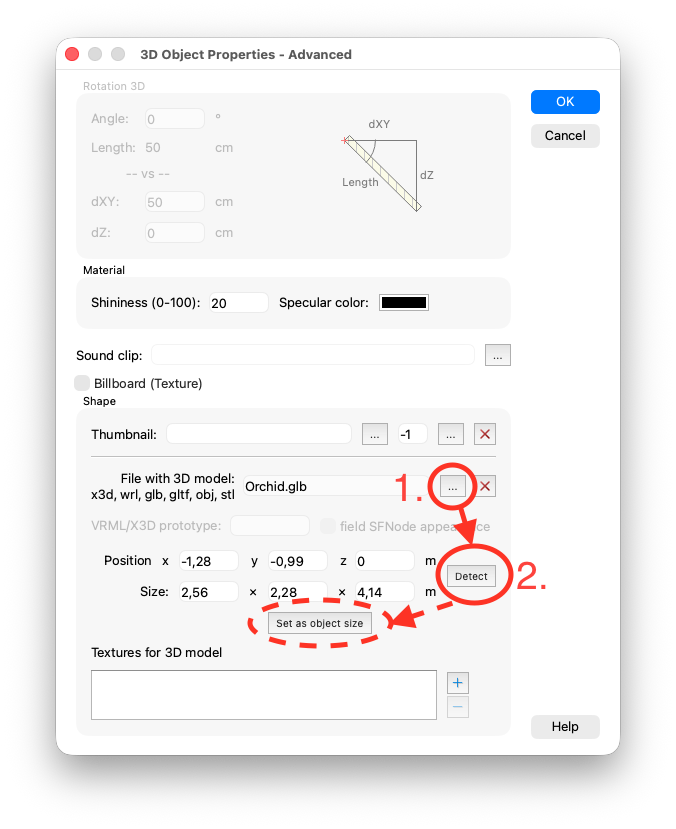
Detect the model dimensions
This is important step, otherwise the model may be distorted. Click Detect button, and Room Arranger will try to find these values for you. If it fails, you have to enter those values manually.
In our Orchid example, the correctly detected dimensions are in metres, which is unrealistic, so we need to adjust the object size manually later, preserving the aspect ratio.
Changing the model color dynamically
You can choose whether to keep the original colors and textures of the model, or to let Room Arranger change them as in case of standard objects. If you choose the second option, uncheck "Use material from the model".
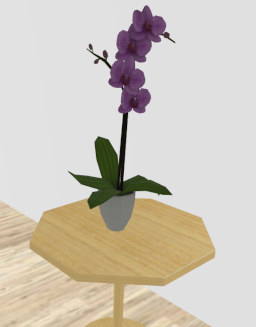
Adapt the object
The object in Room Arranger project needs to have corresponding dimensions to the original 3D model. When the model is defined in real units (cm, m), Room Arranger will use these units to scale the object correctly. Click Set as object size button. Otherwise set the size of the object manually, keeping the aspect ratio among width, length and height.
In our Orchid example, the dimensions of the Plant object are: width 30 cm, length 30 cm, height (z) 60 cm.
3. See the Result
Save the project. After this, the original GLB file is copied into the project structure and is no longer needed.
If you plan to add this object to your User library, it's also a wise idea to take a screenshot of the object in 3D, cut it in the graphic editor, resize it to 56x56 pixels, store it to some PNG file, and use it as a Thumbnail.
I hope you were successful and you see what you wanted to see :-). Good luck.
For Room Arranger version 10 and below
Room Aranger used VRML, and the only supported file format for 3D models was WRL. You had to convert the model into VRML. Additinally Room Arranger required to define the PROTO node inside the file.
1. Find the Model
Try to get the object in the VRML format, otherwise you need to find a way to convert it to VRML. The file extension is .wrl, and to let Room Arranger help you with the import, it should be an uncompressed file.
In our example, we will import a flower. You can find it here: chrysanthemums.wrl.
2. Use the Model
The model needs some 2D representation. It can be any object, including Group or Polygon.
So, add some object to your Room Arranger project, for example Plant object from the library, go to its properties and press More (3D)... button. Navigate to Shape section and click on ... button next to VRML Prototype. Select the WRL file.
Now, Room Arranger will try to fill attributes it needs to know about the model:
- WRL file with the 3D model
- Name of the prototype (filled at # field), there can be more PROTOs inside one file
- Whether the prototype supports changing the color/texture from Room Arranger - it needs to have field SFNode appearance
- Bounding box of the model, filled into Position and Size fields.
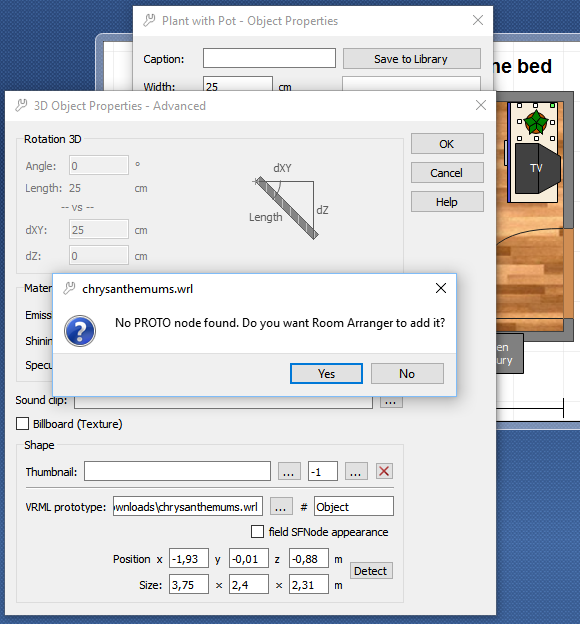
First, we need to have a PROTO node wrapped around the object.
- A) If there are any PROTOs, application will show their list and lets you choose one. It also tries to fill the "field SFNode appearance" correctly.
- B) If there is no PROTO in the file, application will offer you to create one around the contents of the file. Click Yes.
- C) If everything fails, you have to add the PROTO node manually. Basically add
PROTO MyObject [] { Group { children[at the beginning and]}}to the end of the file. And fill MyObject into # field.
Next, let's fill the position and size of the model.
- A) Click Detect button, and Room Arranger will try to find these values for you.
- B) If A fails, you have to get those values manually. Otherwise the 3D model may be distorted.
3. See the Result
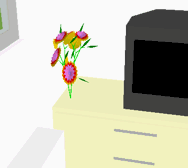
Save the project. After this, the original WRL file is copied into the project structure and is no longer needed.
If you plan to add this object to your User library, it's also a wise idea to take a screenshot of the object in 3D, cut it in the graphic editor, resize it to 56x56 pixels, store it to some PNG file, and use it as a Thumbnail.